Evolut PRO+ Transcatheter Heart Valve
Device preparation
-
Remove the blue locking tabs and integrated baths and rotate the distal half of the delivery system tray counter-clockwise 180o. Clip the tray tab on the distal tray holder on the proximal tray. Fill the integrated loading bath with cold saline (0oC-8oC).
-
Fill the other tray with three compartments with saline at ambient temperature (15oC-25oC). Immerse the THV in the first rinsing bowl and gently agitate it by hand for 15 sec. Repeat another 15 sec rinse in the second rinsing bowl and leave the THV in the third bowl until it is ready to be loaded.
-
Raise the capsule vertically and completely open the capsule using the deployment knob. Slowly flush the capsule and continue to flush while lowering the capsule until it is completely submerged in bath. Leave the syringe in place until loading is completed.
-
Unscrew the dark blue knob. Insert the distal frame of the THV into the loading system and screw the dark blue knob to load the THV into the capsule. Attach a locking tab to hold the capsule submerged in the cold saline bath for remainder of loading. Then remove the loading system.
-
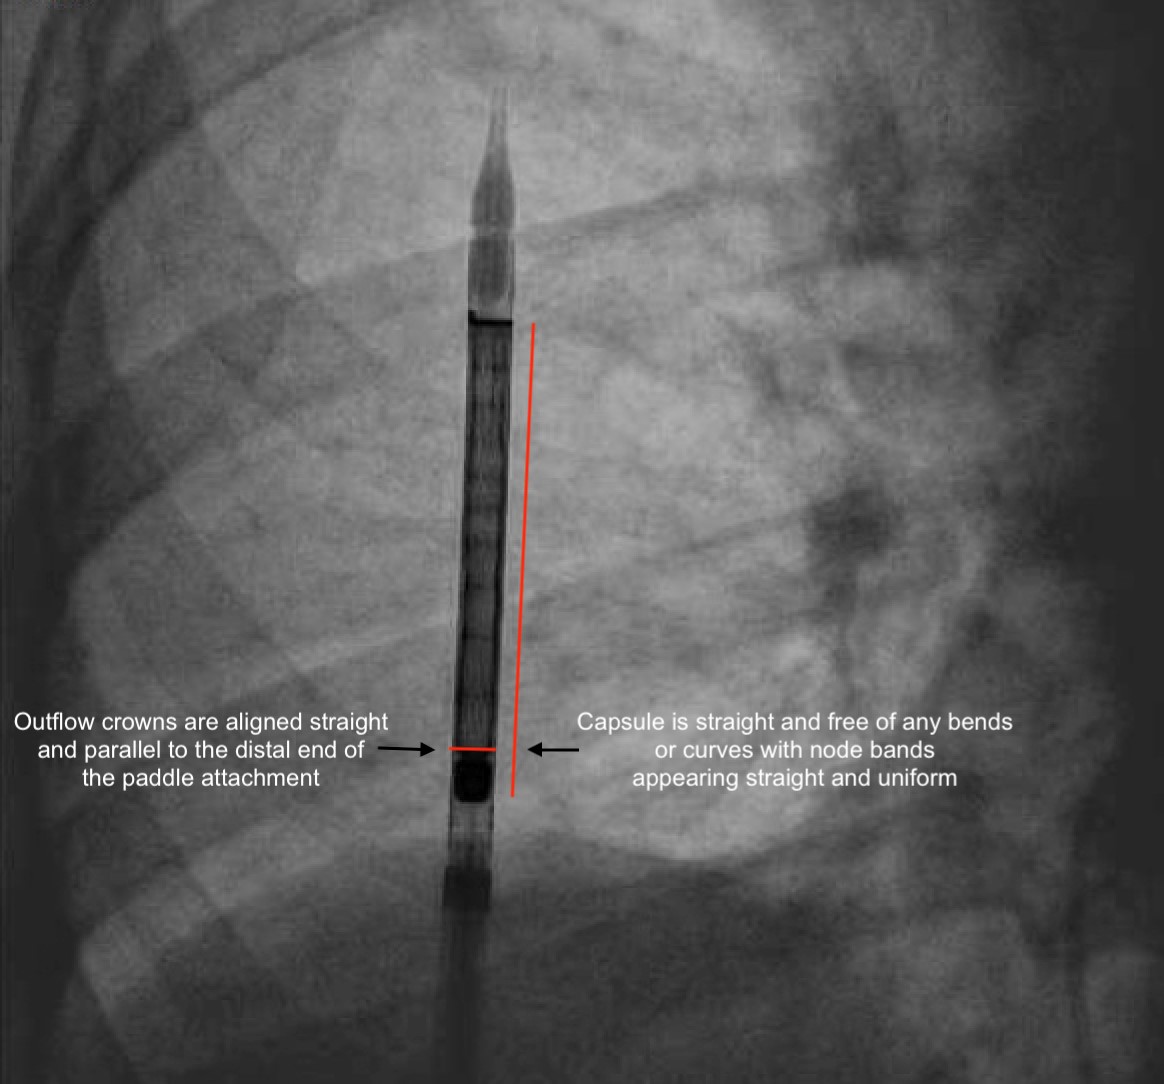
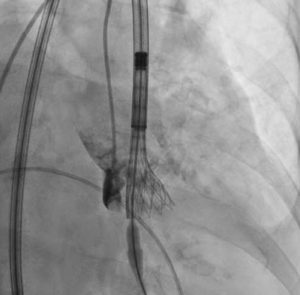
Assess for misloading angiographically. Outflow crowns should be parallel to the distal end of the paddle attachment and capsule should be straight and free of any bends or curves with node bands appearing straight and uniform (figure). Crown overlap in the inflow region may be observed during the fluoro load inspection and this is not a misload.
Crossing the valve
-
Refer to BAV section for crossing the valve. Choose an appropriate Confida/Safari wire depending on the LV size and risk factors for LV perforation (chemotherapy or chronic immunosuppression or radiation therapy)
Cusp overlap technique
-
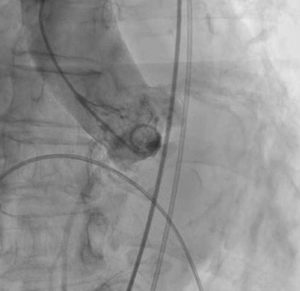
Diagnostic pigtail catheter is advanced into the aortic arch for aortic arch angiography to assess for cerebral embolic protection device. Then pigtail catheter was advanced to the right coronary cusp for root angiography to assess for implantation angle in the annular plane (fluoroscopic angle where bases of all three cusps are aligned in one line and preprocedural CT scan can help identify the best fluoroscopic view to get the appropriate annular plane) (Figure).
Coplanar view -
Then rotate the C-arm to separate the non-coronary cusp from the right and left coronary cusp (Figure).
Insertion of Delivery System with THV
-
Position the pigtail in the NCC.
-
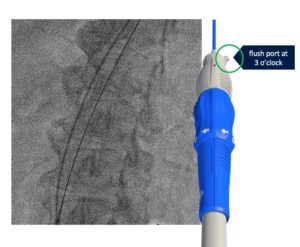
Load the delivery catheter system onto the guidewire and insert into the patient with the flush port facing away from the operator (Oriented at 3 o’ clock) (Figure).
-
Look at Hat marker – Should be on the outer curve of descending aorta in LAO view (i.e., “Hat” on right side of the screen). If not, rotate the delivery catheter counterclockwise wise to spin the “Hat” from inner to outer curve.
-
Take it across the arch under fluoro in a continuous motion to avoid getting hung up at the arch where it can be calcified.
-
Also look at the nose cone whether it is covered while crossing
-
Ensure “Hat” marker is on the greater curvature (left side of the fluoro screen) in the LAO/Classic deployment view, or center front facing you in the 2-cusp view.
-
Cross the AV with Evolut device in two cusp view.
-
Remove parallax of the valve – going more caudal should work; Usually not necessary in 2-cusp view.
-
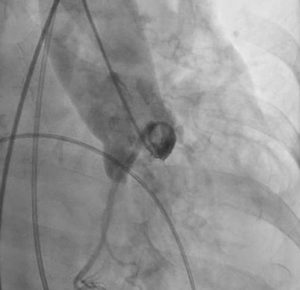
Give puff and see whether we are good (just below the NCC); 1-2 mm below NCC is the key (figure).
Deployment Steps
-
Start pacing at 120 bpm to reduce systolic motion or PVC.
-
Initial 2-3 rotations fast and later slow till we get annular contact.
-
Check position by small injection; First operator adjusts position after annular contact; move fast (as pressure is dropped and if we go slower here, THV may pop out).
-
Rumble – Continue three rotations past till you see pressure wave return.
-
Reduce pacing to 70-80 bpm.
-
Remove parallax of the valve (LAO Caudal).
-
Check with angiogram again (Figure). If appropriate positioning is confirmed (3-5mm of the THV below the annular plane), continue to final release. If not, start rapid pacing up to 150 beats per minute. Reposition the valve by recapturing, fully or partially.
-
Recapture can be done not more than 3 times with single THV device.
Final Release
-
Pull pigtail out of the aortic root (not a must since it can also be removed via J wire carefully if trapped).
-
Pull back stiff wire to remove tension in the system.
-
Pace again at 150 bpm to avoid pop-out.
-
Release slowly and first person give slight forward push on the valve to avoid pop-out if implanting high or not much calcium on leaflets.
-
Make sure paddle out of the C tab and other tab; Can rotate delivery catheter to help free up or push the delivery catheter forward to release tab from paddle.
Removal of the Delivery system
-
Pull stiff wire with soft portion inside nose cone – make sure nose cone is away from Evlout frame. Remove nose cone carefully to inside the valve, then advance the stiff wire into LV as the delivery catheter is removed; Careful not to have nose cone interact with the crowns or tab at the inner curve of the ascending aorta. Once the valve in descending aorta, push grey to blue to remarry the nose cone to the capsule. Then the delivery system is taken out of the body. The procedure is finished with aortogram to assess for aortic regurgitation.